Circles & ovals
Monday, February 25th, 2019
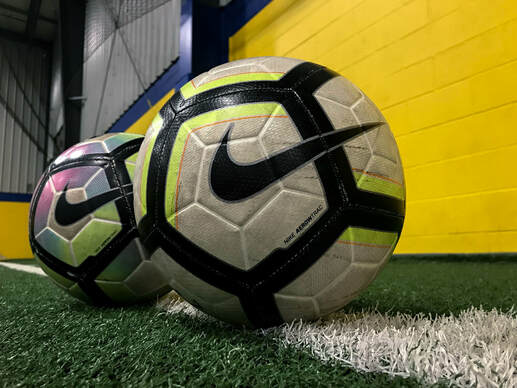
Picture #1: Soccer balls
|
In this picture, I wanted to capture one of the things I love most, soccer. I first adjusted the white balance and cropped the image. I turned the exposure down a little bit. I increased the saturation in it, making the colours pop out more (including adjusting the yellow, green, and blue hues). I also increased the detail, sharpness, highlights, etc. until I liked the way the picture looked. It didn't require a lot of editing as it is a very simple photo. |
|
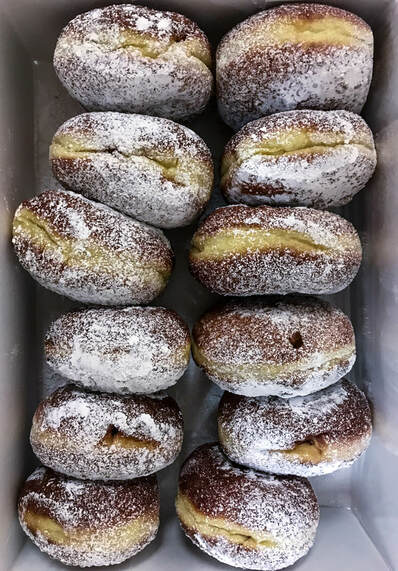
Picture #2: paczkis
|
I took this picture on 'Strove Tuesday', at one of my church events before everyone devoured them. I took the picture from an overhead view, capturing the 12 Paczkis inside the box. I used flash to gain more detail. While editing, I firstly adjusted the white balance, lens correction, and cropped the image slightly. I turned the exposure down slightly, and increased the saturation. To give it more of a 'cool' look than 'warm', I decreased the temperature and increased the tint. I also increased the saturation and yellow hue so that the dough part of the paczki would stand out more in the picture. To make the icing sugar stand out a bit more, I increased the whites and decreased the blacks to give it a sharper look. Lastly, I increased the sharpness, detail, and clarity so that the flecks of icing sugar would pop more. |
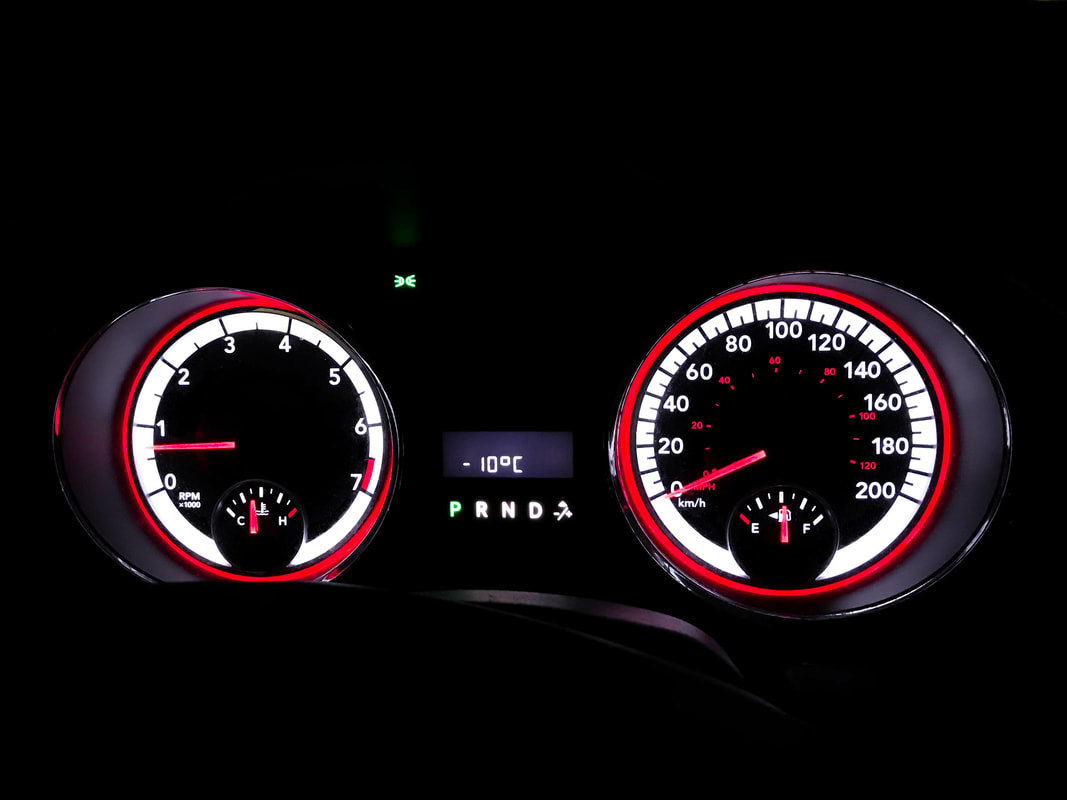
PICTURE #3: car interior
|
I captured this image in my van at night, so that it would make the colours come out more. While editing, I firstly adjusted the white balance, lens correction, and cropped the image slightly (including adjusting the vertical & horizontal skew). I decreased the exposure a lot, so that the main focus would be on the vehicle's circles. There was some areas that had an off-black colour, so I adjusted it by taking the brush tool and going over it in black to touch-up the area. I increased the saturation, red and green hue, and whites so that the colours would contrast better against the black. Lastly, I increased the detail, sharpness and clarity.
|
|
PATTERNS
Monday, March 4th, 2019
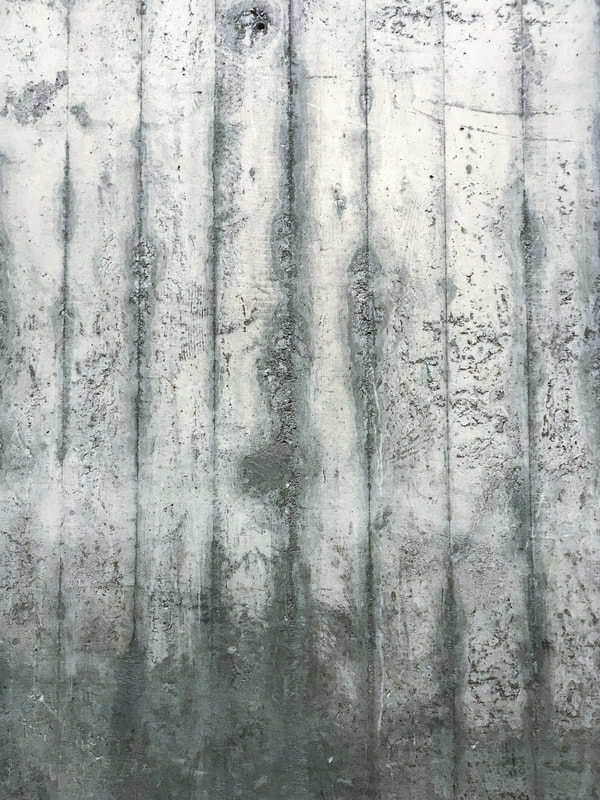
PICTURE #1: texture wall
|
I first adjusted the white balance and cropped the image. I turned the exposure down a little bit. I increased the saturation in it, making the colours pop out more. I increased the whites, decreased the blacks and increased the blue hue. I also increased the detail, sharpness, highlights, etc. until I liked the way the picture looked. It didn't require a lot of editing as it is a very simple photo. |
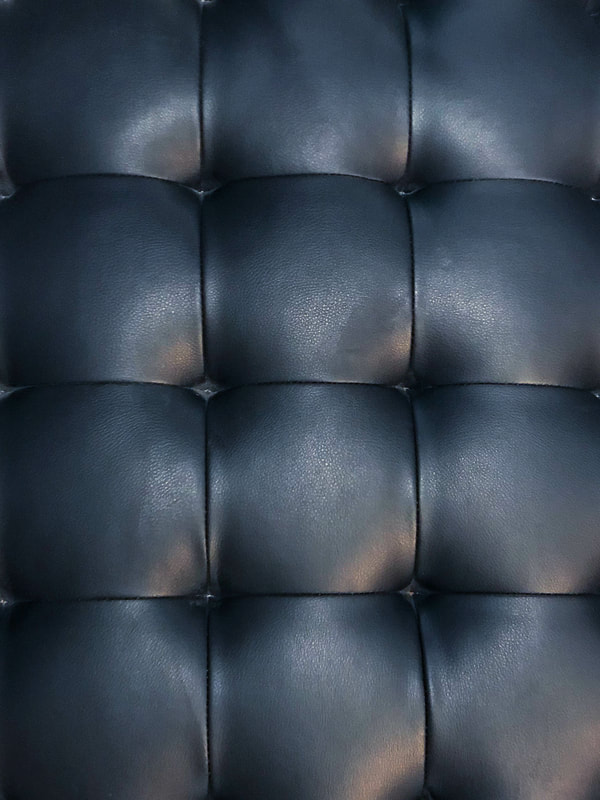
PICTURE #2: Seat cushion
|
For this seat cushion, I altered the image a lot to give it a colour change. While editing, I firstly adjusted the white balance, lens correction, and cropped the image slightly. I decreased the temperature a lot, along with the exposure. I increased the tint slightly. I increased the teal, blue, and purple hues and the saturation. To make the highlights stand out more, I increased the highlights and the whites. Lastly, I increased the sharpness, detail, and clarity a lot so that you could see the leather of the cushion in the image. |
|
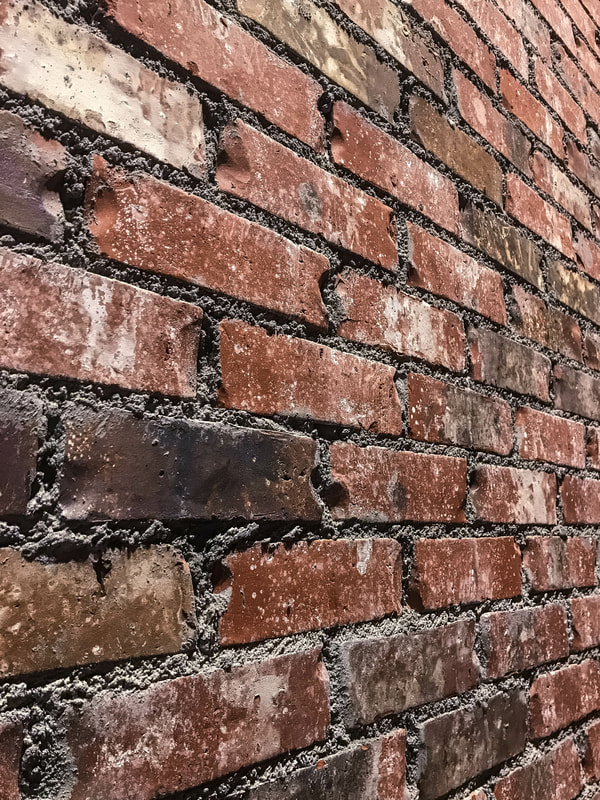
PICTURE #3: brick wall
|
I first adjusted the white balance and cropped the image. I turned the exposure down a little bit. I increased the saturation in it, making the colours pop out more (including adjusting the red hues). I also increased the detail, sharpness, highlights, etc. until I liked the way the picture looked. It didn't require a lot of editing as it is a very simple photo. |
GLASSES & BOTTLES
Monday, March 18th, 2019
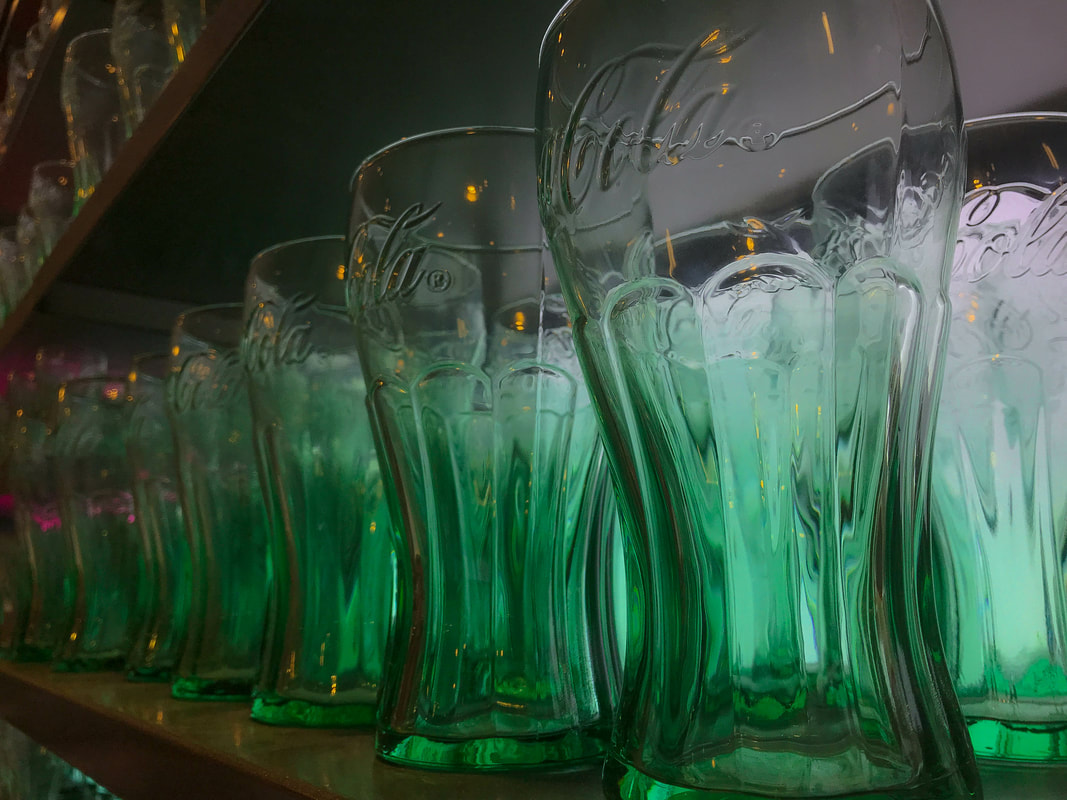
PICTURE #1: Coca cola bottles
|
I first adjusted the white balance and cropped the image. I turned the exposure down a little bit. I increased the saturation in it, making the colours pop out more (including adjusting the yellow, green, and blue hues). I also increased the detail, sharpness, highlights, etc. until I liked the way the picture looked. |
|
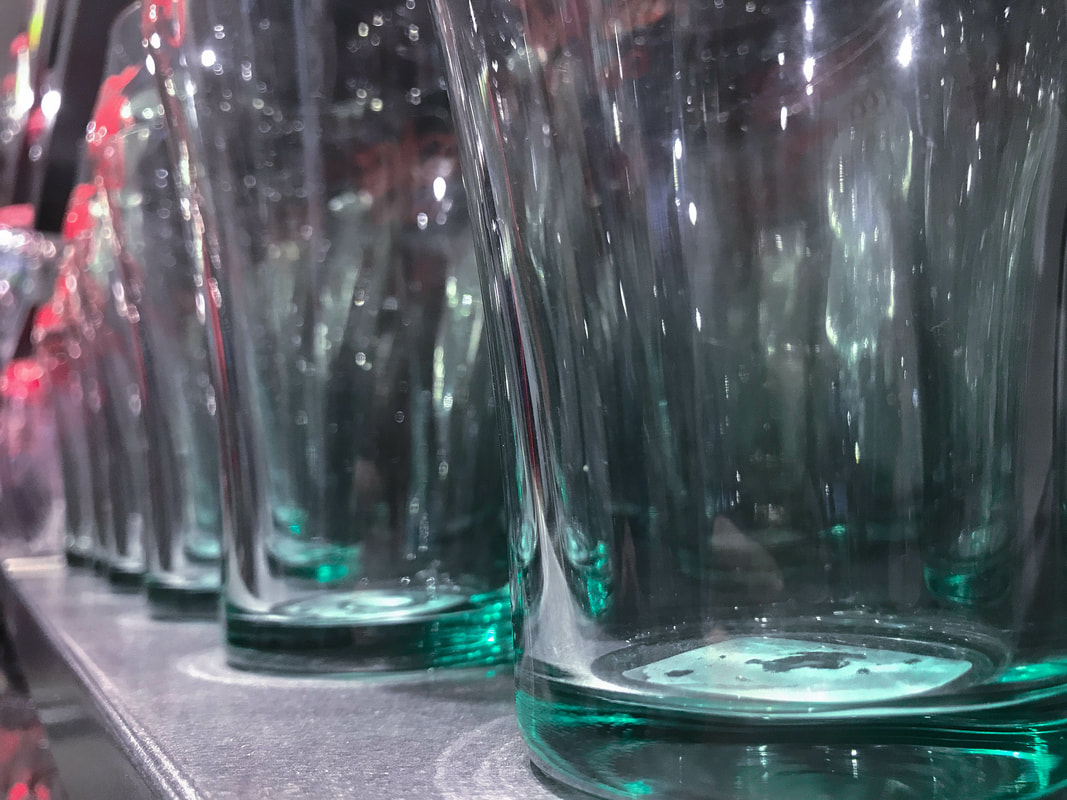
PICTURE #2: glass balls

|
I first adjusted the white balance and cropped the image. I turned the exposure down a little bit. I increased the saturation in it, making the colours pop out more (including adjusting the green and blue hues). I also increased the detail, sharpness, highlights, etc. until I liked the way the picture looked. It didn't require a lot of editing as it is a very simple photo. |
PICTURE #3: glass bottles
|
I first adjusted the white balance and cropped the image. I turned the exposure down a little bit. I increased the saturation in it, making the colours pop out more (including adjusting the red and blue hues). I also increased the detail, sharpness, highlights, etc. until I liked the way the picture looked. |
|
shoes
Monday, March 18th, 2019
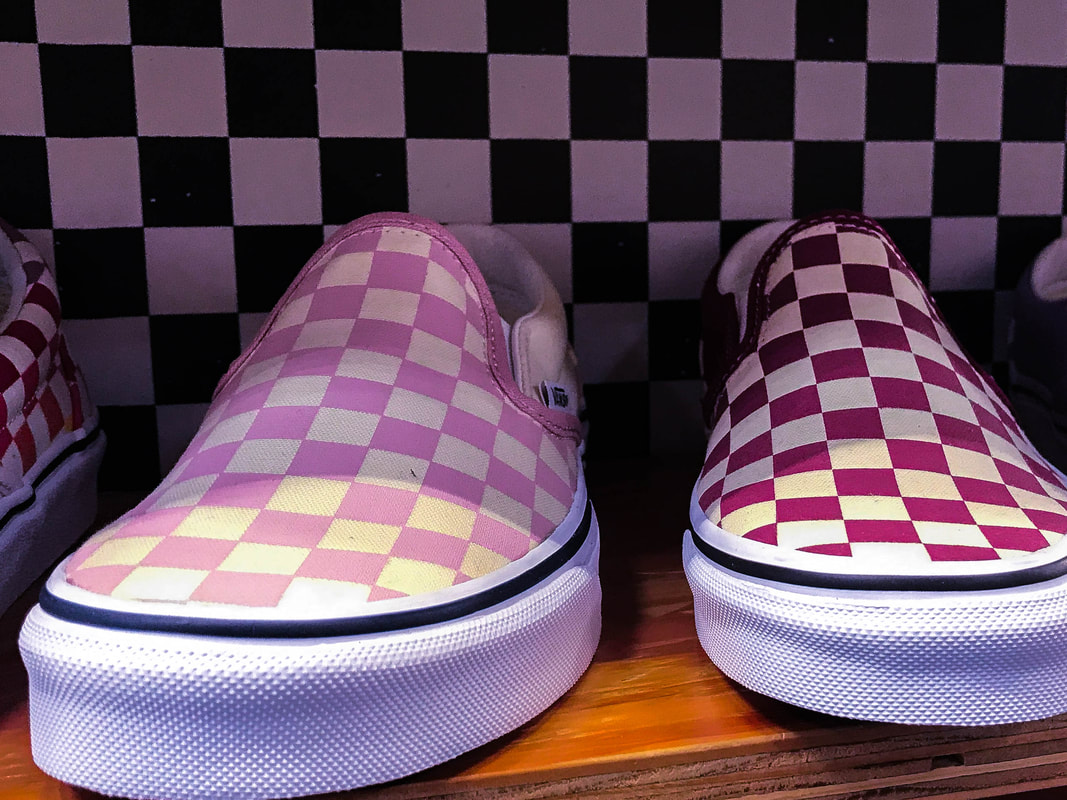
Picture #1: Checkered vans
|
I first adjusted the white balance and cropped the image. I turned the exposure up a little bit. I also increased the contrast. I increased the saturation in it, making the colours pop out more (including adjusting the red, magenta, and purple hues). I also increased the detail, sharpness, highlights, etc. until I liked the way the picture looked. I also increased the whites to give the shoes a more vibrant look. |
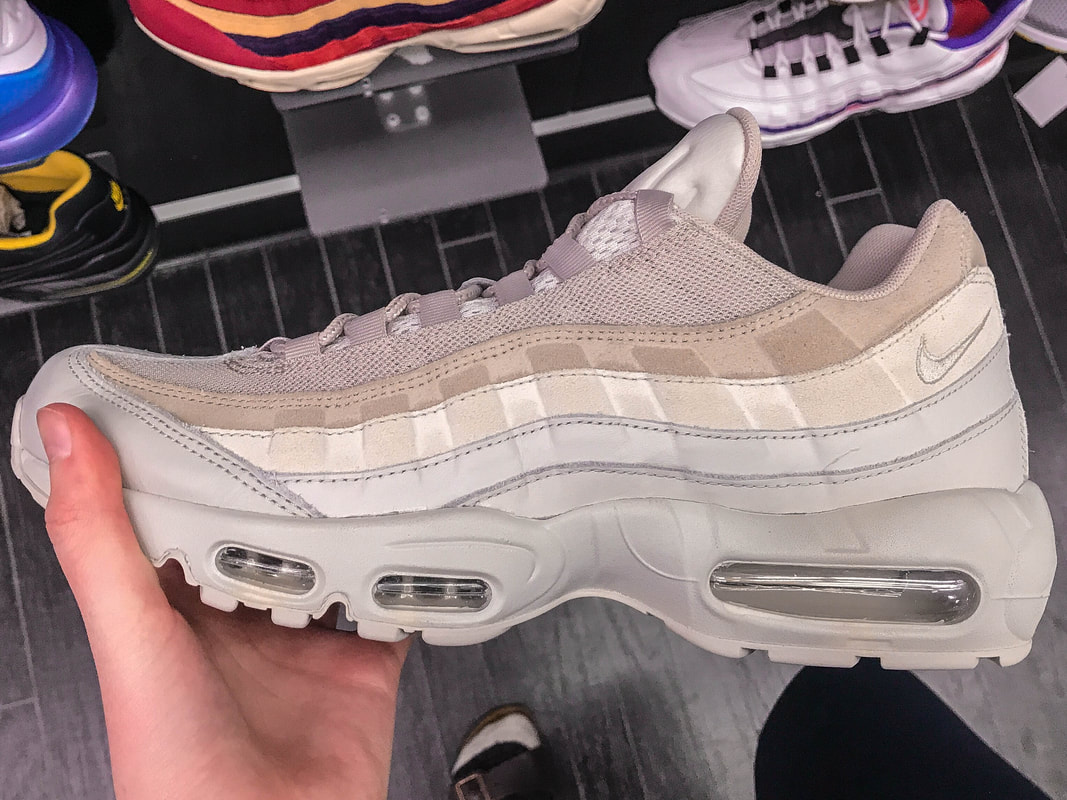
Picture #2: Nike air max 95's
|
I wanted to capture this image like a staged snapshot with a shallow depth of field. I first adjusted the white balance and cropped the image. I turned the exposure down a little bit. I increased the saturation in it, making the colours pop out more. I also increased the detail, sharpness, highlights, etc. up a lot to really define the shoe to add to the shallow depth of field. |
|
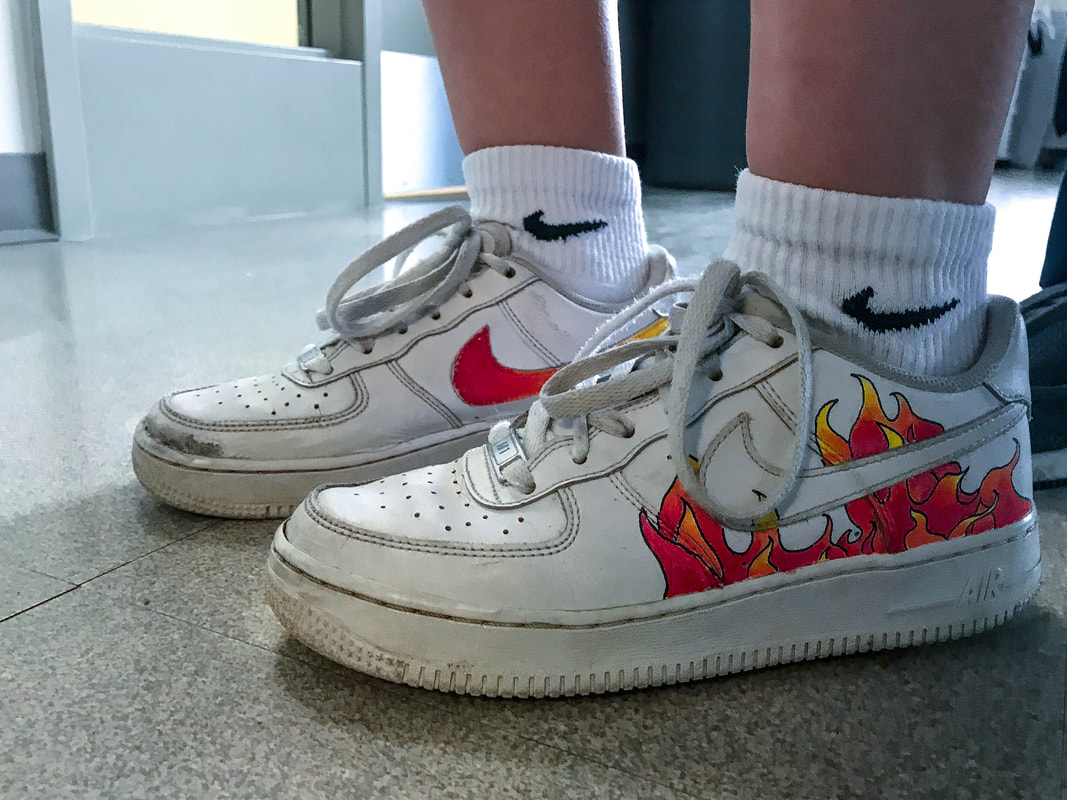
picture #3: flame nike air force 1's
|
These white Air Force 1's were designed and created by my friend, Alex Stoinescu. I first adjusted the white balance and cropped the image. I turned the exposure down a little bit. I increased the saturation in it, making the colours pop out more (including adjusting the yellow, orange, and red hues). I also increased the detail, sharpness, highlights, etc. I increased the whites and blacks, making the shoes look brighter in the image. |
