'lammy the goat' EDIT
BEFORE
|
after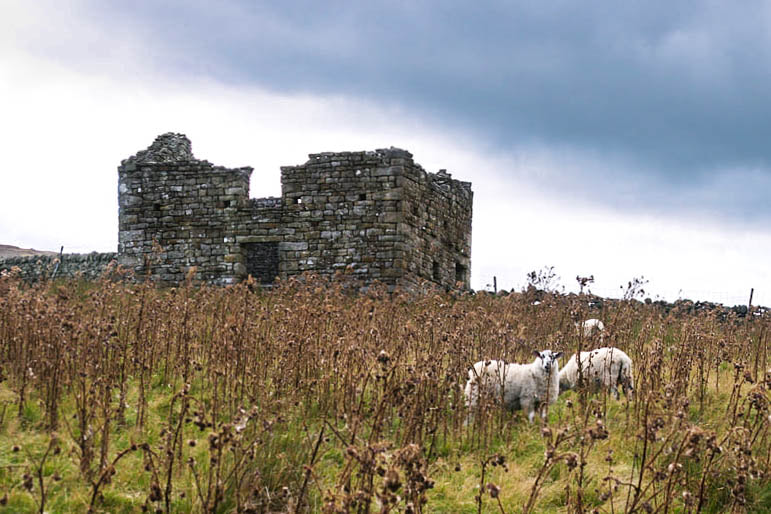
|
This was the first stock image we used when starting to work with the program Lightroom. First, I adjusted the white balance by finding a medium grey in the picture. Then, I selected the lens correction boxes and cropped the image so the sheep would be off-centered, drawing attention to them. Next, I then just played around with the 'basic' editing tools by adjusting the exposure, saturation, highlights and contrast. I increased the blue, green, and red saturation to add more vibrant colours to the picture. Lastly, I used the adjustment brush and simply brushed over the clouds a bit, turning down the exposure and increasing the blue saturation.
MAN EDIT
BEFORE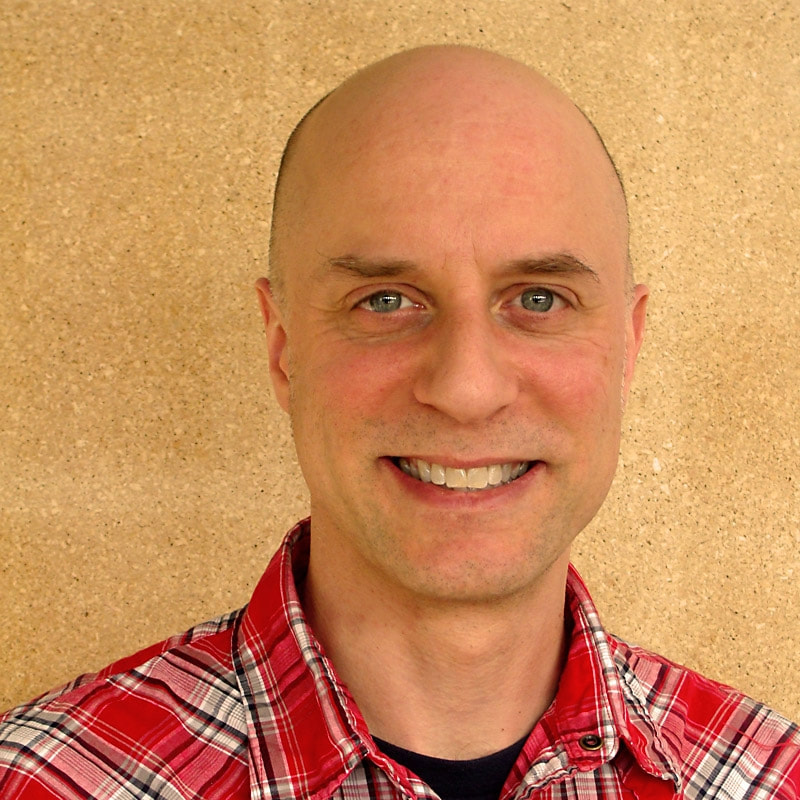
|
AFTER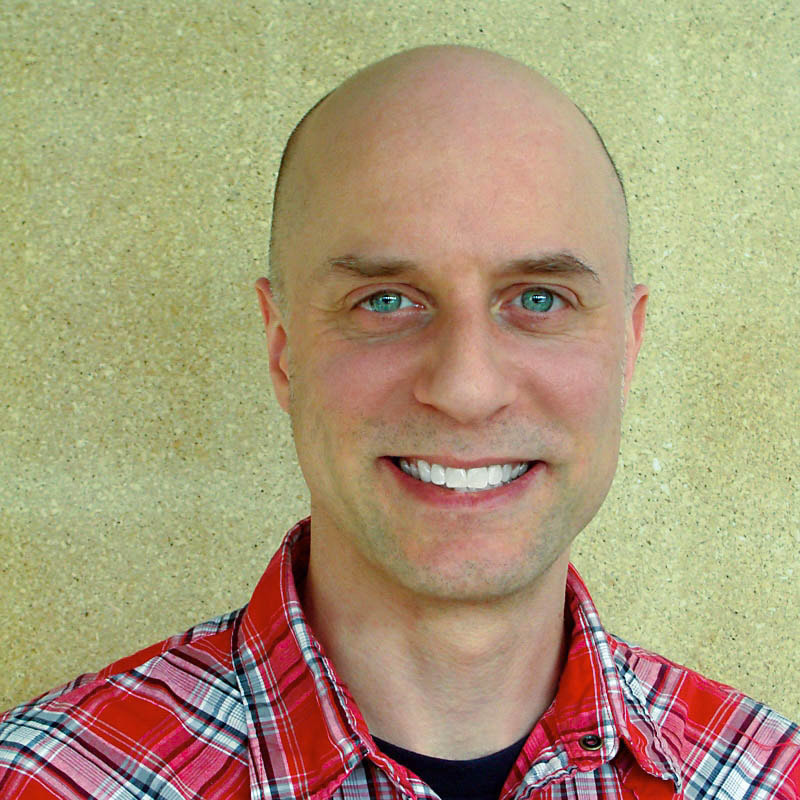
|
In our second photo of this man, I first adjusted the white balance in the image. I felt like no cropping was required, as it was already a small square photo and there's not a lot to work with. I then used the adjustment brush on 'teeth whitening' mode, and brushed over his teeth. I modified the whites and exposure slightly to add the white glow, but not overdoing it. Then, I used the spot removal brush and removed any unwanted spots, blemishes, pimples, wrinkles, etc. on his head, face and neck. Next, I used the 'soften skin' and also the 'teeth whitener' adjustment brush to lighten the red area of his cheeks and to smooth his skin out. Lastly, I decided to play around with his eyes a bit by just using the regular adjustment brush and changing the temperature and blue/green saturation of his eyes to add a more 'sea blue' effect vs 'grey blue'.
woMAN EDIT
BEFORE
|
AFTER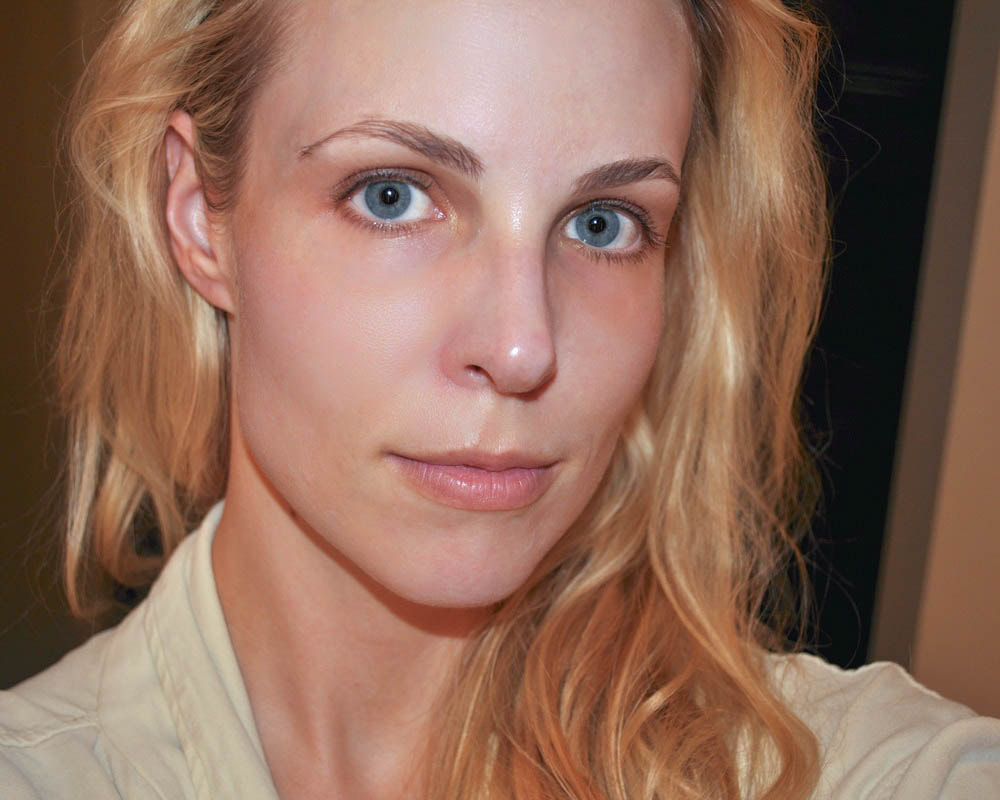
|
Our last photo to work with on Lightroom was this woman, which required a lot of work. I first adjusted the white balance like always. Then, I started removing the blemishes from her face using the spot removal brush. Next, I worked on the darkness of her eye circles by using the 'teeth whitening' mode on the adjustment brush, and also the 'soften skin' mode. Continuing using the 'soften skin' brush, I used it on the rest of her face (forehead, cheeks, chin, nose) and slightly increased the smoothness to add a more even and clear skin tone. While still using the burn tool, I made strokes over her eyelashes and added new one, adding extra length and volume to them. I also turned down the exposure to make them appear darker. Lastly working on the eyebrows, I removed some unwanted hair in weird areas using the spot removal tool to give the eyebrows a more definite shape. Then, using the clone spot removal brush, I added some extra strokes on the eyebrow by sampling it from the same area.
